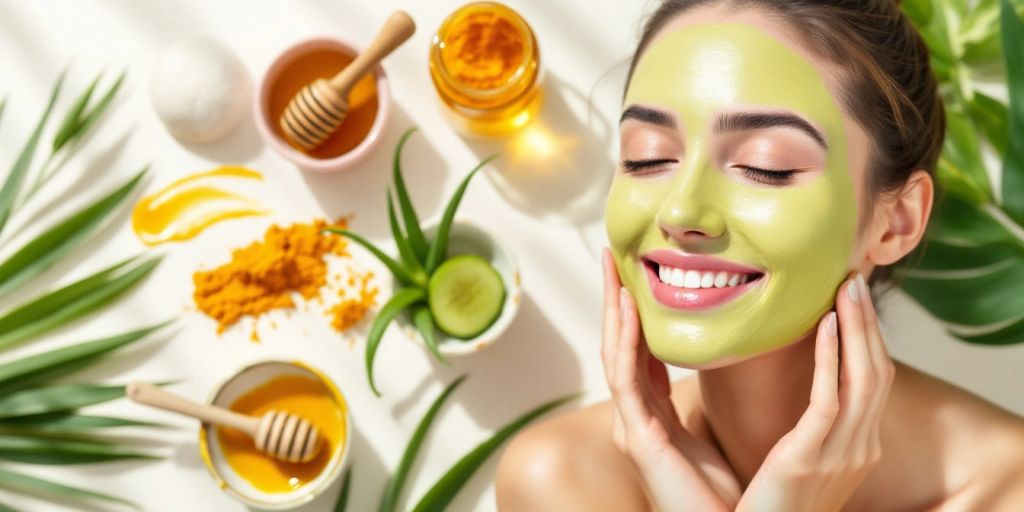
Creative and Easy DIY Face Mask Ideas from Malaysia for Glowing Skin
Exploring Traditional Malaysian Ingredients for DIY Face Masks
Benefits of Local Fruits and Vegetables
Using local fruits and vegetables in your DIY face masks can provide amazing benefits for your skin. Here are some popular options:
- Papaya: Rich in enzymes that exfoliate and brighten the skin.
- Avocado: Packed with healthy fats that hydrate and nourish.
- Cucumber: Known for its cooling properties, perfect for soothing irritated skin.
Incorporating Malaysian Herbs and Spices
Malaysian herbs and spices are not just for cooking; they can also enhance your skincare routine. Consider these:
- Turmeric: Anti-inflammatory and helps with acne.
- Ginger: Stimulates circulation and gives your skin a healthy glow.
- Lemongrass: Acts as a natural astringent, tightening pores.
Using Natural Clays and Minerals
Natural clays and minerals are essential for detoxifying your skin. Here’s why you should use them:
- Bentonite Clay: Absorbs excess oil and impurities.
- Kaolin Clay: Gentle on the skin, great for sensitive types.
- Rice Powder: Exfoliates and brightens the complexion.
DIY face masks can be a fun and effective way to treat your skin using ingredients right from your kitchen!
How to Create a Hydrating Avocado and Honey Face Mask
Step-by-Step Guide
- Gather your ingredients: You will need 1 ripe avocado, 1 tablespoon of honey, and a splash of vinegar (optional).
- Mix it up: Combine the avocado and honey in a mini food processor until smooth. Alternatively, mash them together in a bowl with a fork.
- Apply the mask: Spread the mixture evenly over your face, avoiding the eye area.
- Let it sit: Allow the mask to work its magic for about 15-20 minutes.
- Rinse off: Use warm water to wash your face and pat dry with a clean towel.
Benefits for Dry Skin
- Hydration: Avocado is rich in healthy fats and vitamins, making it perfect for hydrating dry skin.
- Soothing: Honey has natural soothing properties that help calm irritated skin.
- Nourishing: This mask provides essential nutrients that promote a healthy glow.
Tips for Best Results
- Use fresh ingredients: Always opt for fresh avocado and raw honey for maximum benefits.
- Patch test: If you have sensitive skin, do a patch test before applying the mask to your face.
- Frequency: Use this mask once a week for optimal hydration and skin health.
Remember: Keeping your skin hydrated is crucial for a youthful appearance. Regular use of hydrating masks can help maintain a glowing complexion.
This simple DIY mask is not only effective but also budget-friendly, making it a favorite among beauty influencers. Try it out and enjoy the benefits of soft, hydrated skin!
Brightening Your Skin with a Papaya and Yogurt Mask
Ingredients and Preparation
To create a refreshing papaya and yogurt mask, gather the following ingredients:
- 1 ripe papaya
- 1/2 cup of plain yogurt
- 1 tablespoon of honey
Preparation Steps:
- Peel and chop the papaya into small pieces.
- In a bowl, mash the papaya until smooth.
- Mix in the yogurt and honey until well combined.
Skin Benefits of Papaya
Papaya is rich in vitamins A, C, and E, making it a powerhouse for skin health. It helps to:
- Exfoliate dead skin cells
- Brighten the complexion
- Hydrate and nourish the skin
Why Yogurt is Essential
Yogurt contains lactic acid, which acts as a natural exfoliant. It helps to:
- Remove dead skin cells
- Brighten dark spots
- Moisturize the skin
Tip: For best results, apply this mask twice a week to see noticeable improvements in your skin’s glow!
The Power of Coconut and Turmeric in Malaysian Face Masks

Combining Coconut Oil and Turmeric
Coconut oil and turmeric are a dynamic duo in skincare. Coconut oil is loaded with antioxidants and is known to reduce inflammation, fight acne, and be the ultimate moisturizer. When combined with turmeric, it can lighten and tighten the skin, making it a perfect choice for a face mask.
Benefits for Acne-Prone Skin
- Reduces Inflammation: Turmeric has anti-inflammatory properties that help calm irritated skin.
- Fights Acne: The antibacterial qualities of both ingredients can help prevent breakouts.
- Moisturizes: Coconut oil hydrates the skin, preventing dryness that can lead to more acne.
How to Apply
- Mix Ingredients: Combine 1 tablespoon of coconut oil with 1 teaspoon of turmeric powder.
- Apply: Spread the mixture evenly on your face, avoiding the eye area.
- Leave On: Let it sit for 15-20 minutes before rinsing off with warm water.
Using this mask regularly can help you achieve glowing skin. Influencers rave about its effectiveness, making it a must-try for anyone looking to enhance their skincare routine!
Revitalize with a Cucumber and Aloe Vera Gel Mask
Cooling Effects of Cucumber
Cucumber is a fantastic ingredient for a refreshing face mask. It hydrates and soothes the skin, making it perfect for hot days or after sun exposure. Here’s how to use it:
- Slice a fresh cucumber and blend it until smooth.
- Strain the juice to remove pulp.
- Mix the cucumber juice with 2 tablespoons of aloe vera gel.
Aloe Vera for Skin Healing
Aloe vera is known for its healing properties. It helps to:
- Reduce inflammation
- Moisturize dry skin
- Promote healing of minor cuts and burns
Combining cucumber with aloe vera creates a mask that not only hydrates but also heals. Influencers like @skincarebyhyram often recommend this duo for glowing skin.
Application Tips
To get the best results from your cucumber and aloe vera mask:
- Apply it to clean skin and leave it on for 15-20 minutes.
- Rinse with cool water to enhance the refreshing effect.
- Use this mask 2-3 times a week for optimal hydration.
This simple mask is a great way to embrace natural beauty and keep your skin looking fresh and vibrant!
Crafting a Soothing Oatmeal and Banana Face Mask
Ingredients and Method
To create a soothing oatmeal and banana face mask, you will need:
- 1 ripe banana
- 2 tablespoons of oatmeal
- 3 teaspoons of rosewater
Steps to Prepare:
- Mash the banana in a mixing bowl until smooth.
- Add the oatmeal and rosewater, mixing well until combined.
- Apply the mask to your face and let it sit for 20 minutes.
- Rinse off with warm water and follow up with your favorite toner.
Benefits for Sensitive Skin
This mask is perfect for sensitive skin as it combines the soothing properties of banana with the gentle exfoliation of oatmeal. It helps to hydrate and calm irritation, leaving your skin feeling refreshed and soft.
Enhancing with Essential Oils
For an extra boost, consider adding a few drops of essential oils like lavender or chamomile. These oils are known for their calming effects and can enhance the mask’s soothing properties. Just remember to do a patch test first to ensure no allergic reactions occur.
This mask is a great way to pamper your skin without breaking the bank. Plus, it’s made from ingredients you likely already have at home!
Detoxifying Charcoal and Green Tea Face Mask
Why Use Charcoal in Face Masks
Charcoal is a superstar in skincare! It helps to draw out impurities and toxins from your skin, making it perfect for a detoxifying mask. When combined with green tea, it enhances the mask’s effectiveness, providing a refreshing boost to your skin.
Green Tea’s Antioxidant Properties
Green tea is packed with antioxidants that fight free radicals, which can cause skin damage. This makes it a great addition to your face mask. It not only helps in detoxifying but also soothes and calms irritated skin.
Application and Frequency
- Mix the Ingredients: Combine 2 tablespoons of clay, 2 tablespoons of warm green tea, and 1 tablespoon of activated charcoal in a non-metallic bowl.
- Apply the Mask: Spread the mixture evenly on your face, avoiding the eye area. Let it sit for 15-20 minutes.
- Rinse Off: Use warm water and a soft cloth to gently remove the mask.
- Frequency: Use this mask 1-2 times a week for best results.
Remember, consistency is key! Regular use can lead to clearer, healthier skin.
Influencer Tips
Many beauty influencers recommend using this mask before a big event for that extra glow. They suggest pairing it with a hydrating serum afterward to lock in moisture.
Final Thoughts
This detoxifying mask is not just easy to make but also incredibly effective. With ingredients you can find at home, you can achieve glowing skin without breaking the bank. Explore a wide range of beauty products to complement your skincare routine!
Nourishing Your Skin with a Rice Water and Honey Mask
Preparation of Rice Water
To make rice water, simply rinse 1 cup of rice to remove impurities. Then, soak it in 2-3 cups of water for about 30 minutes. Strain the rice, and keep the water. This liquid gold is rich in vitamins and minerals that can nourish your skin.
Benefits of Honey for Skin
Honey is a natural moisturizer and has antibacterial properties. Here are some key benefits:
- Hydrates the skin, keeping it soft and supple.
- Helps to heal wounds and reduce scars.
- Acts as a natural exfoliant, removing dead skin cells.
How to Use Effectively
- Mix 1/2 cup of rice water with 1 tablespoon of honey.
- Apply the mixture to your face using a cotton ball or your fingers.
- Leave it on for 15-20 minutes, then rinse with warm water.
- For best results, use this mask 2-3 times a week.
This simple mask can transform your skin, making it glow with health and vitality. Regular use can lead to noticeable improvements in texture and tone.
Real User Review
Influencer @BeautyGuru123 says, "I love using the rice water and honey mask! It’s so easy to make and my skin feels amazing afterward!"
DIY Face Masks for Different Skin Types
Identifying Your Skin Type
Understanding your skin type is the first step in creating effective DIY face masks. Here’s a quick guide:
- Oily Skin: Shiny appearance, enlarged pores, prone to acne.
- Dry Skin: Flaky, rough texture, may feel tight or itchy.
- Combination Skin: Oily in some areas (like the T-zone) and dry in others.
- Sensitive Skin: Easily irritated, may react to products.
Tailoring Masks to Your Needs
Once you know your skin type, you can choose the right ingredients:
- For Oily Skin: Use ingredients like charcoal and lemon to absorb excess oil.
- For Dry Skin: Opt for honey and avocado to add moisture.
- For Combination Skin: A mix of cucumber and yogurt can balance both oily and dry areas.
- For Sensitive Skin: Gentle ingredients like oatmeal and aloe vera are soothing.
Common Ingredients and Their Uses
Here’s a quick reference table for common ingredients:
| Ingredient | Skin Type | Benefits |
|---|---|---|
| Charcoal | Oily | Detoxifies, unclogs pores |
| Honey | Dry | Moisturizes, antibacterial |
| Avocado | Dry | Nourishing, rich in fats |
| Cucumber | All types | Soothing, hydrating |
| Oatmeal | Sensitive | Calming, reduces irritation |
| Yogurt | Combination | Balances oil, hydrates |
Remember: Always do a patch test before applying any mask to your face to avoid reactions.
By using these tips, you can create personalized face masks that cater to your unique skin needs. Influencers like Nadia Hussain and Siti Nurhaliza often share their favorite DIY recipes, proving that natural skincare can be both effective and fun!
Incorporating Essential Oils into Your DIY Face Masks
Essential oils can elevate your DIY face masks, making them not only effective but also enjoyable to use. These oils bring unique benefits that can target specific skin concerns. Here’s how to incorporate them into your skincare routine:
Choosing the Right Essential Oils
- Lavender: Great for calming sensitive skin.
- Tea Tree: Perfect for fighting acne and blemishes.
- Rose: Excellent for dry or mature skin.
Blending Techniques
- Dilute essential oils with a carrier oil (like coconut or jojoba) to avoid irritation.
- Mix a few drops into your mask ingredients before applying.
- Test on a small skin area first to check for reactions.
Safety Precautions
- Always use skin-safe essential oils.
- Avoid using oils that can cause photosensitivity, like Bergamot, before sun exposure.
- Pregnant women should consult a doctor before using essential oils.
Remember, the right essential oils can transform your DIY masks into powerful skincare treatments. Experiment with different combinations to find what works best for your skin type!
Budget-Friendly DIY Face Masks Using Kitchen Ingredients

Creating your own face masks at home can be both fun and economical. You don’t need to spend a fortune to pamper your skin! Here are some easy ideas using common kitchen ingredients that can help you achieve glowing skin without breaking the bank.
Common Household Ingredients
- Fruits: Use ripe bananas, avocados, or strawberries. These fruits are packed with vitamins and can nourish your skin effectively.
- Oats: Ground oats can soothe and hydrate your skin, making them perfect for sensitive skin types.
- Honey: A natural humectant, honey helps retain moisture and can be used in various masks.
Cost-Effective Skincare Solutions
- Banana and Honey Mask: Mash one banana and mix it with a tablespoon of honey. Apply for 15 minutes and rinse.
- Oatmeal and Yogurt Mask: Combine 2 tablespoons of oatmeal with 2 tablespoons of yogurt. Leave it on for 20 minutes for a soothing effect.
- Avocado and Olive Oil Mask: Mash half an avocado and mix with a teaspoon of olive oil. This mask is great for dry skin.
Tips for Mixing and Matching
- Experiment: Don’t be afraid to mix different ingredients to find what works best for your skin.
- Patch Test: Always do a patch test before applying a new mask to ensure you don’t have an allergic reaction.
- Stay Consistent: For best results, use your DIY masks regularly, about once a week.
Remember, homemade masks can be just as effective as store-bought ones. With the right ingredients, you can create first-class skin nutrition right from your kitchen!
Looking for easy and affordable ways to pamper your skin? Try making your own face masks with simple ingredients from your kitchen! These DIY masks are not only fun to create but also great for your skin. Visit our website for more tips and recipes to help you glow!


